 |
KaliVeda
Toolkit for HIC analysis
|
 |
KaliVeda
Toolkit for HIC analysis
|

The main purpose of KaliVeda is to describe charged-particle detector arrays in order to perform the following tasks:
In order to carry out these tasks we need a complete description of the array's geometry, including detector dimensions and positions and dead zones which may or may not be associated to the structure of the detectors themselves. The base class for decribing a single detector array geometry is KVMultiDetArray, while KVExpSetUp describes a combined array of two or more KVMultiDetArray objects.
In this chapter we will first show how to create new arrays by describing the detector geometry using the ROOT geometry package and KVMaterial to represent the different absorbers (for energy loss calculations). Then we will show how to import the array geometry into the KaliVeda framework using KVGeoImport and KVMultiDetArray. We will present the various structures and objects of different types which are automatically deduced from the geometry:
and how they can be used to navigate around the geometry of either a newly-created or already existing multidetector array geometry.
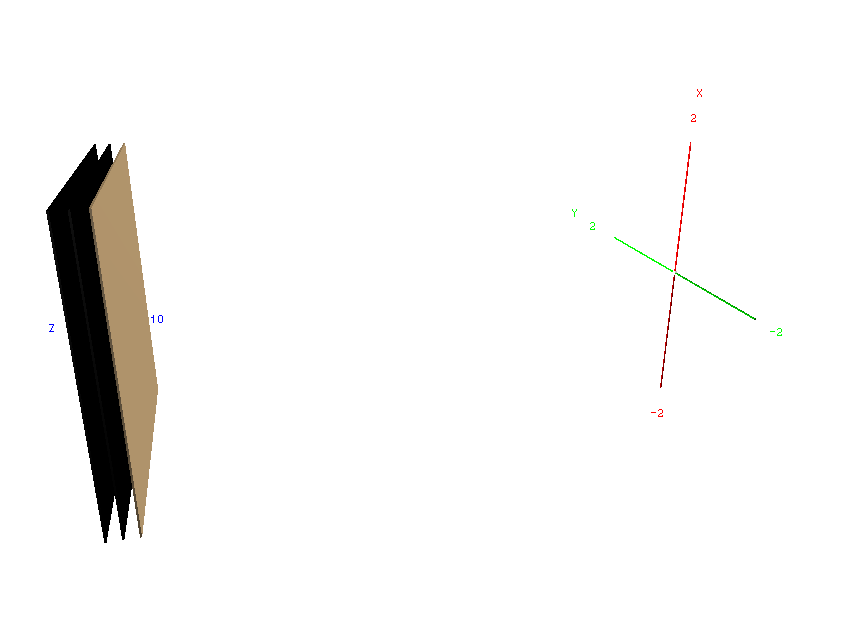
Let us begin with a simple example: a single telescope made up of a stack of 3 identical silicon wafers. The first thing to do when describing any geometry is to initialise the geometry manager:
Next we set up the materials required for the construction of our array, and create a 'top' volume which will be the 'world' containing our geometry:
In this case, our WORLD is a vacuum-filled box with sides whose half-lengths are 50 cm, i.e. it is a cube of side 1 metre. The KVMaterial class is an interface to the energy loss calculator (see Energy loss & range calculations ). Note that any KVMaterial object can be used to obtain the "Vacuum" medium.
Now we can build our silicon wafers, which are to be 5 cm square and 300 \(\mu\)m thick:
Note that, once again, the dimensions are given in terms of half-lengths. The name of our silicon box is very important: in order for KaliVeda to recognise a volume as a detector, and add a KVDetector object to the KVMultiDetArray representing it, its name must begin with DET_.
Next we place three silicon detectors one behind the other, with the first one being 10 cm from the centre of the WORLD volume (the origin of the coordinate system), and the two others placed respectively 0.25 cm and 0.5 cm behind it:
Notice how we use the same volume 3 times to create 3 independent detectors? There is no need to create more than one volume (geometric shape/medium) to describe detectors which are the same apart from their position (node) in the geometry. The second argument in each call to top->AddNode(...) is a 'node number' which is used to distinguish the three detectors: they will be automatically given names DET_SILICON_1, DET_SILICON_2 and DET_SILICON_3. They will in turn be represented by KVDetector objects with names SILICON_1, SILICON_2 and SILICON_3 in the final geometry.
The last step in creating a valid ROOT geometry description of an array is
Closing the geometry prepares and optimizes the geometrical modeller; no further changes can be made to the geometry after this step. You can now view the geometry in 3D using OpenGL:

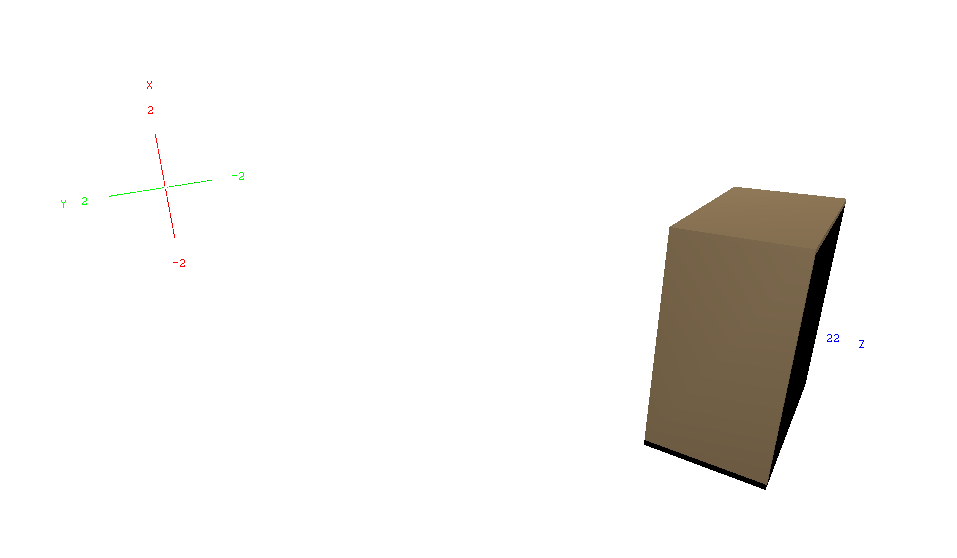
Now for a slightly more realistic example: an ionisation chamber consisting of an aluminium frame, two mylar windows, and between the windows: isobutane gas at a pressure of 50 mbar. As before we begin by initialising the geometry manager, the materials we'll need and create a WORLD volume:
Now we build the volume corresponding to our two (square) mylar windows:
Now the volumes for building the frame: one for the top & bottom, and one for the sides:
The keyword DEADZONE_ in the name of these volumes will be recognised by KaliVeda when the geometry is imported: when particles are propagated through the array during detection simulation, any which arrive in these volumes will be stopped regardless of their kinetic energy.
Finally we construct the gas volume where the energy losses of charged particles traversing the detector will be reported as the energy measured in the detector: this is the 'active' part of the detector, the volume name has the keyword ACTIVE_:
Now in order to build our detector, we put together all the pieces in a special kind of volume which is built from other volumes: a TGeoVolumeAssembly, to which we give the name for our new detector, beginning with the keyword DET_:
Last of all we position our ionisation chamber where we want in our geometry:
As in the previous example, in order to have the entrance window of the ionisation chamber at a given distance from the origin, because positioning of volumes is done with respect to the centre of the volume, we place our volume at the distance plus half of the (total) thickness of the ionisation chamber.
After closing the geometry we are then ready to visualize and import the geometry into KaliVeda.

There is a trick to placing detectors at given angular coordinates \((\theta,\phi)\) while keeping the detector's axis aligned with the flight path of particles coming from the target (assumed to be placed at the origin). As it is not easy to deduce, we provide the static method
As always, using the KaliVeda coordinate-system convention: i.e.
Then in order to position a detector volume at a distance \(D\) cm from the target at angular coordinates \((\theta,\phi)\) with its entrance window perpendicular to the vector connecting the centre of the detector to the origin, do the following:
Any association of detectors which occurs several times in a geometry in different places, with the same internal structure, can be defined as a 'structure'. Such a structure can be defined once and then re-used many times in your detector array. They will be converted into KVGeoStrucElement objects when the geometry is imported into KaliVeda. A KVGeoStrucElement is a basic building block of any detector array geometry, which can contain detectors and other structures. KVMultiDetArray itself is a child class of KVGeoStrucElement.
As an example, we could combine our ionisation chamber example with a silicon detector placed immediately behind in order to create a telescope:
The keyword STRUCT in the structure's volume name is essential. Each node added to the geometry using this structure will generate a KVGeoStrucElement (after importing the geometry) with name TELESCOPE_1, TELESCOPE_2, etc. The detectors inside each telescope will generate KVDetector objects with names TELESCOPE_1_CHIO_1, TELESCOPE_1_SI_1, TELESCOPE_2_CHIO_1, TELESCOPE_2_SI_1, etc. (note that the _1 after CHIO and SI is the node number referring to the positioning of the detectors inside the structure, which does not change).
Once you have a valid ROOT geometry describing your array, you can import it into KaliVeda using the KVGeoImport class to initialise a new KVMultiDetArray object:
Here we have used the gGeoManager global pointer to the currently active geometry: you can of course use whatever valid pointer you have to your geometry (e.g. myGeo in the above examples).
As an example, let us see what happens if you import the first example geometry given above, composed of a telescope of three silicon detectors:
The first step is a scan of the geometry over the angular ranges indicated, which in this case is overkill: you can change the default range and angular step size if you wish when you call KVGeoImport::ImportGeometry().
These are the results of the scan: 3 detectors were correctly identified and imported. You can see the list by doing:
Next we calculate all possible trajectories through the detectors of the array that a particle leaving the target (origin) could take. In this case the answer is: 1! You can obtain the list with:
(Notice that trajectories always begin with the detector the furthest from the target (origin). See class KVGeoDNTrajectory for a full explanation of how to use these trajectories to navigate through the geometry)
From this information, we then proceed to deduce all possible ways that a (charged) particle could be identified from its energy losses in the detectors on the different trajectories. By default, this means associating each pair of successive detectors on the same trajectory into a \(\Delta E\)- \(E\) identification telescope, but it is possible (by defining appropriate plugins for the KVIDTelescope base class) to add single-detector identification methods (such as pulse shape analysis in silicon detectors or cesium iodide scintillators). To see the list of deduced identification telescopes:
Finally, we calculate all possible trajectories that could correspond to particles stopping in the detectors of the array, from which we can try to reconstruct the identity of the particle. In this case, there are 3 possibilities, corresponding to particles stopping in either the first, second, or third detector. To see the list of reconstruction trajectories:
Each reconstruction trajectory has an associated list of identification telescopes which could be used to try to identify corresponding particles. See class KVReconNucTrajectory.
Now let us see what happens if we import our ionisation chamber+silicon telescope structure example:
The output of the KVMultiDetArray::Print() method is two lists: first the list of all detectors in the array, and then the list of all structures (KVGeoStrucElement) in the array, and the lists of all detectors that they contain. Here we can see that our TELESCOPE structure has been faithfully imported into the array as expected as a KVGeoStrucElement object, but there is also a second structure which is of type GROUP. These structures are defined automatically for all detector geometries, a group (KVGroup) corresponds to the largest subset of detectors which can be treated independently of all others in the array: they are defined by a common set of trajectories which concern only the detectors of the group and no others.
The names of the detectors reflect their positioning in a TELESCOPE structure, which gives quite long names, especially for the derived identification telescope(s):
What can we do?
We can change the default names given to structures and detectors using two methods provided by KVGeoNavigator (the base class for KVGeoImport). They allow to define our own formatting conventions for the names derived from the geometry. For example, if we do
then the result is:
See KVGeoNavigator::SetStructureNameFormat() and KVGeoNavigator::SetDetectorNameFormat() for more details on the syntax.
Not every case can be treated using formatting strings as above however, so we provide another possibility. If you provide a file containing lines like:
and then do
the file will be used to look up the name of each detector and/or structure as derived from the geometry using the default formatting rules (or whatever formatting you impose), and replace it with whatever name is given in the file:
With a detector array geometry described by KVMultiDetArray or a derived class, you have access to all useful information on the geometry, the detectors, the structures and the identification telescopes etc. of the array, e.g.:
(these methods are actually defined by base class KVGeoStrucElement).
The output of the KVMultiDetArray::Print() method is two lists: first the list of all detectors in the array, and then the list of all structures (KVGeoStrucElement) in the array, each with the list of all detectors that it contains. As well as user-defined structures (such as the association of two detectors into a TELESCOPE structure above) there are also structures of type GROUP which correspond to objects of class KVGroup. These structures are defined automatically for all detector geometries, a group corresponds to the largest subset of detectors which can be treated independently of all others in the array: they are defined by a common set of trajectories which concern only the detectors of the group and no others.
The geometry is represented as a set of nodes (KVGeoDetectorNode) which are linked by trajectories (KVGeoDNTrajectory) corresponding to all unique paths any particle may take starting from the origin (target position) and traversing the detectors of the array. Each node is associated with a detector. Each node/detector can be associated with one or more trajectories going either forwards (towards the target) or backwards (away from the target), depending on how detectors in the array are aligned.
For example, a simple array composed of a stack of 3 silicon detectors, placed one behind the other, with SILICON_1 being closest to the target and SILICON_3 furthest away, contains a single trajectory:
The name/title of the trajectory indicates the order of crossing different detectors when moving along the trajectory: notice that trajectories always begin with the detector the furthest from the target. It is simple to access the trajectories associated with any given detector, but you first have to access the associated node in the geometry, e.g.:
It is then easy to follow the trajectory i.e. to iterate over all nodes/detectors in a given direction:
In addition, for each trajectory consisting of \(N\) nodes/detectors, there are \(N\) reconstruction trajectories which may be used to reconstruct particles from measured energy losses in the detectors of the array, depending on which detector the particle stopped in (which is assumed to be the first i.e. furthest from the target detector on the trajectory which fired). Using the same example of a 3-silicon telescope array, we have:
These are KVReconNucTrajectory objects. As reconstructed particles are always associated with a reconstruction trajectory, one can always access the trajectory for each particle when analysing reconstructed i.e. experimental (or filtered) data. These trajectories can be iterated over in the same way as the others: